Computer updates to close 2011

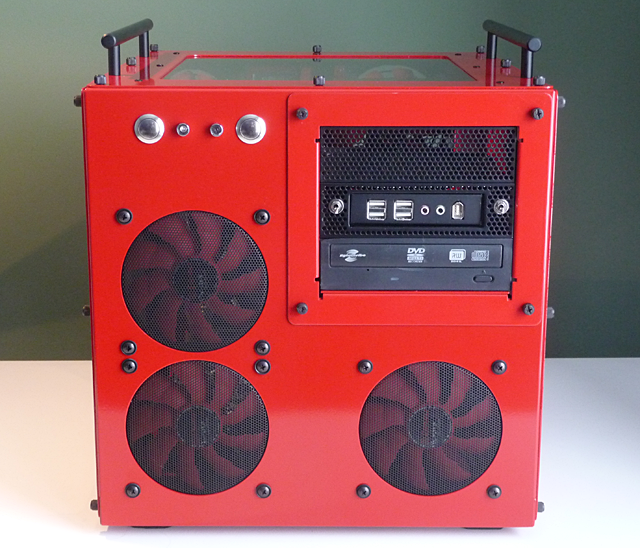
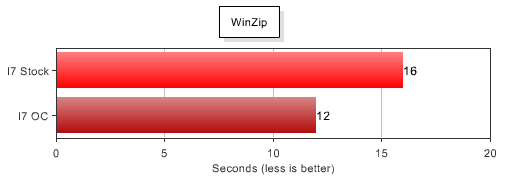
As 2011 wound down, I did a little work to the Big Red Machine. Since its i7 (1366 socket) platform is still holding up well against Intel’s SandyBridge (v1 and 2), there’s no need to do a clean sweep for another year or even more. But as it gets close to it’s third birthday, a few updates were in order.

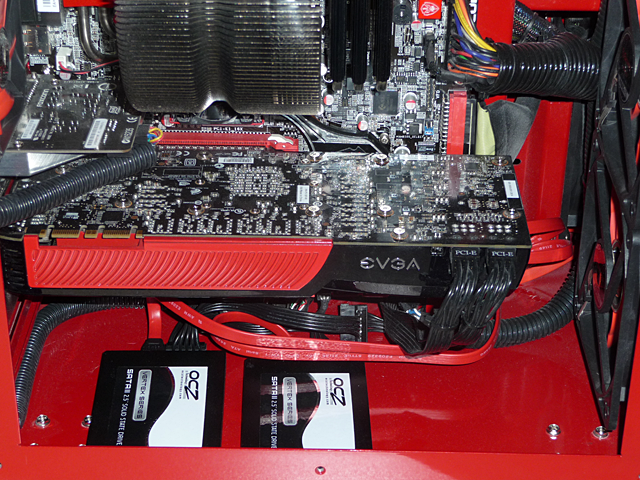
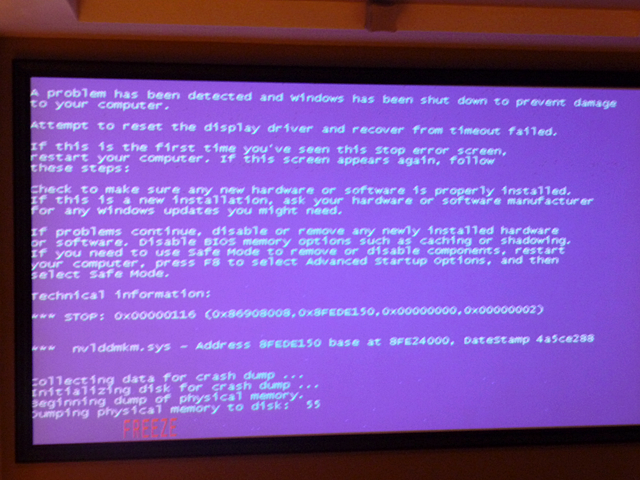
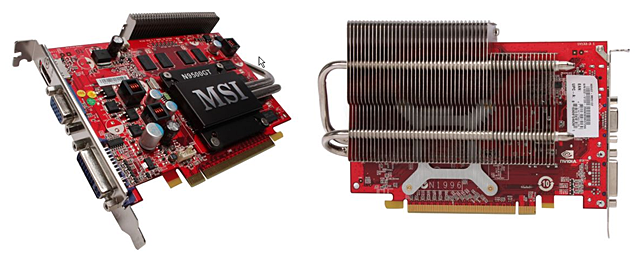
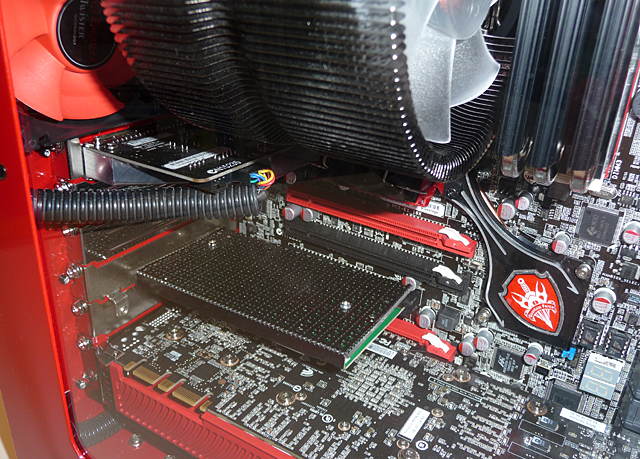
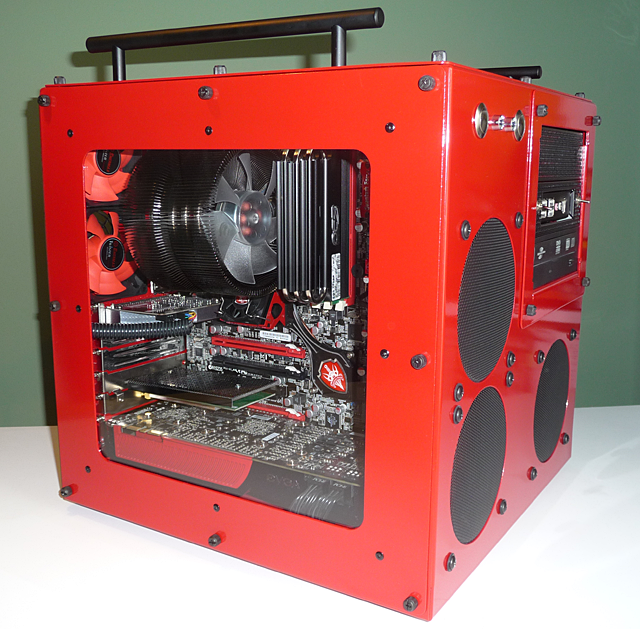
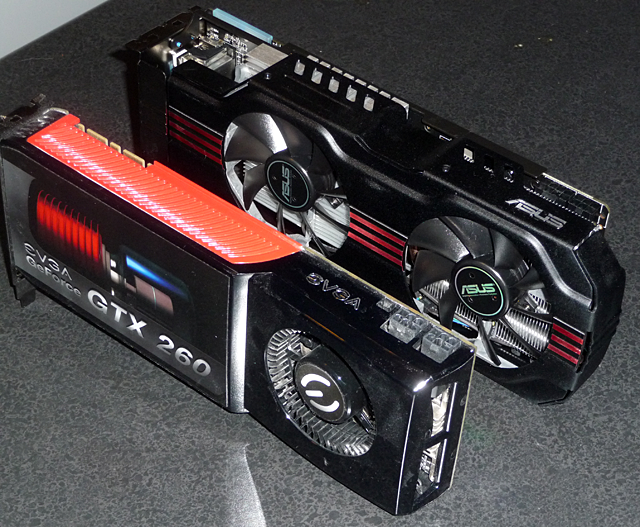
First up was a graphics card update. The overclocked gtx 260 has been holding up well, but is starting to show its age by not supporting DX11 for the latest releases. With Radeon cards outperforming their Nvidia counterparts dollar to dollar, I jumped over to team red and picked up a beefy Asus 6950 with 2GB ram. The card hits a good price point (right about what I spent for the 260) and matches up well with Nvidia’s gtx570. Even if it’s not the baddest boy around, this thing is a monster.

It sets up shop over three expansion slots and is about a foot long. Just a couple years ago I thought the 260 was huge, but now it looks modest. The 6950 also has a total of 6 outputs, for running more displays at once (with AMD Eyefinity) than I’ll ever need.

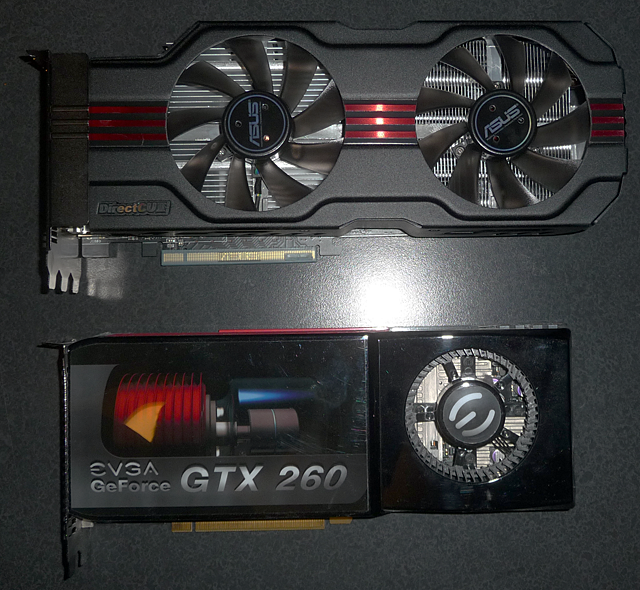
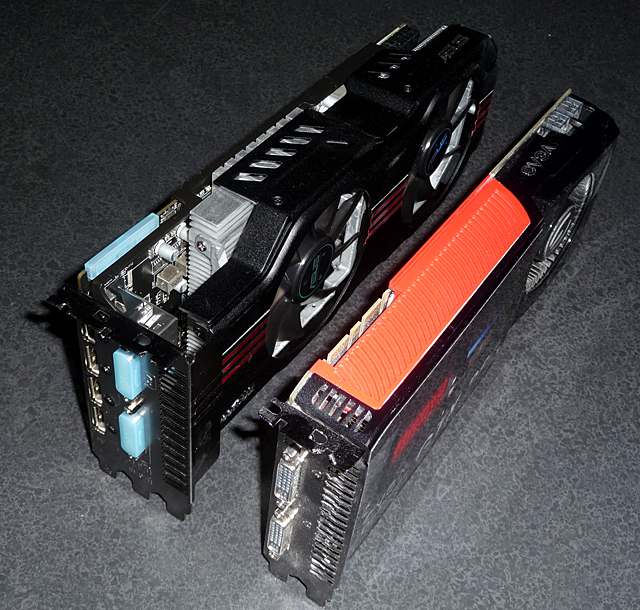
This particular 6950 excels at staying cool. It has a huge heatsink under that metal cover with several “direct contact” heat pipes, and two 100mm fans. I can definitely push this hard without cooking the box. New benchmarks for the graphics card will be posted soon.

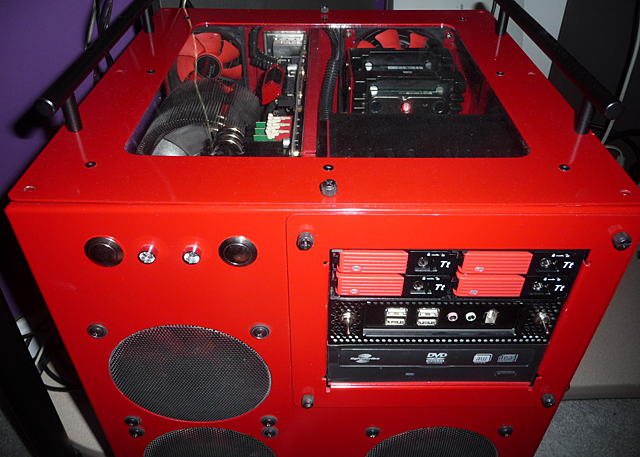
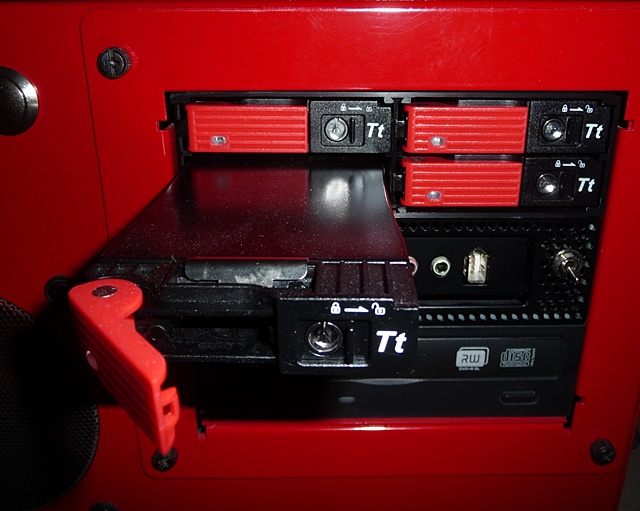
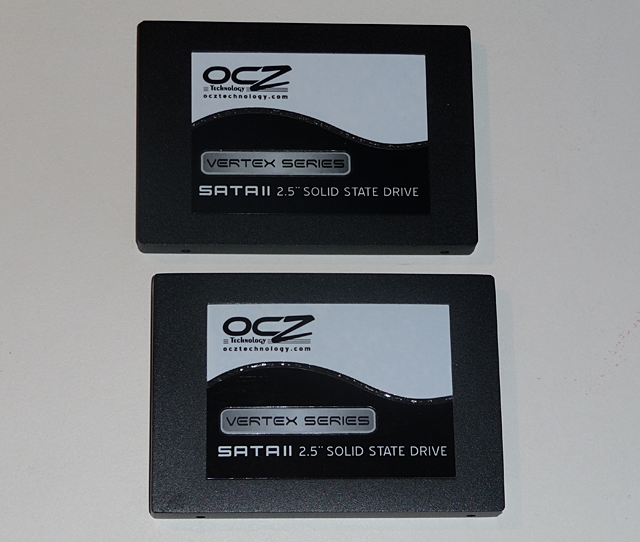
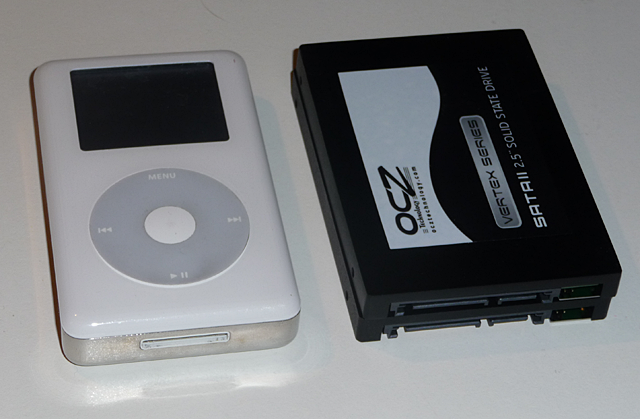
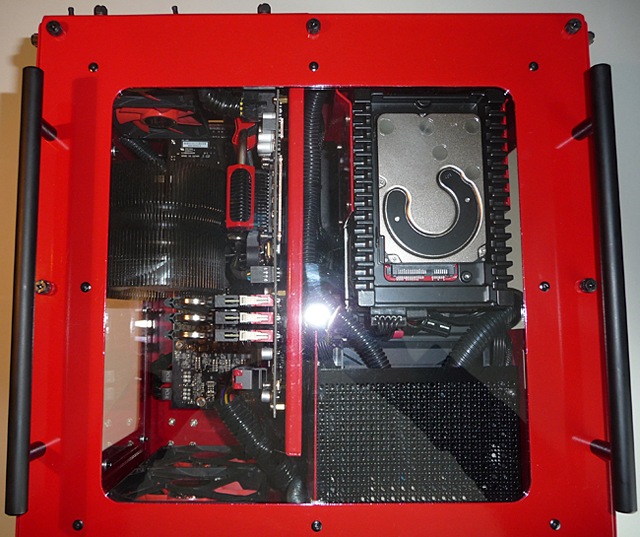
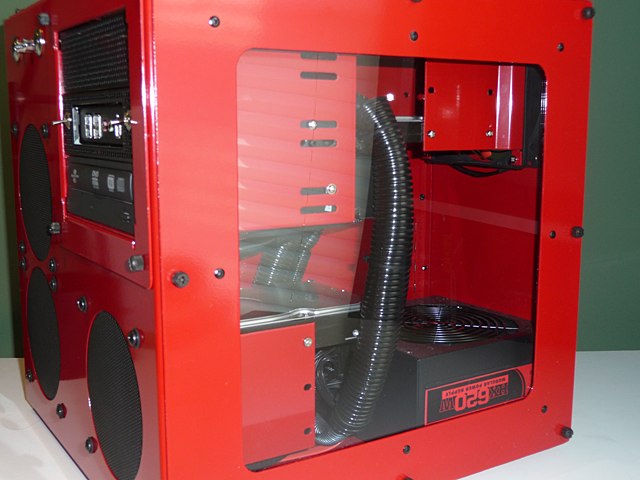
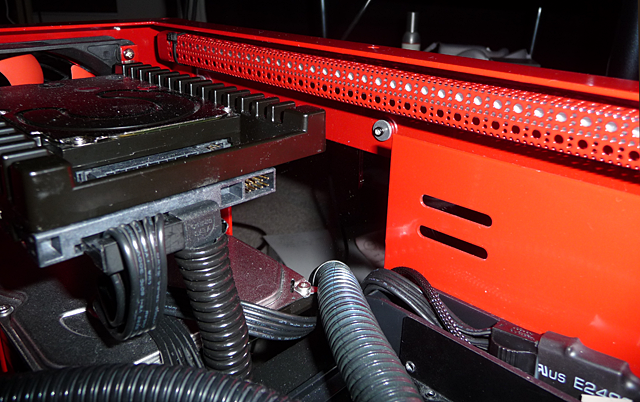
After the gfx upgrade only one other thing was bothering me – the SSDs that were still sitting loose in the case. So, I finally popped for a 5.25 bay device to house up to 4 drives. Ok, I may have paid a bit more for one that matched my case perfectly, but it is a nice dock. Each drive can easily be swapped and locked, has it’s own activity LEDs, and has a direct backplane connection. I had to rearrange the other drives in my case a little to make it fit, but it’s so much cleaner now. My two RAID 0 SSDs are in there now, and I’ve got two more slots already connected up should I want to drop in a couple more.

Filed under Comp hardware / mods

Raiding for fun and profit (part 2)

Once the two SSDs were installed and recognized by Windows in RAID 0, it was time to move my boot partition from its 80GB 7200 rpm Seagate Barracuda to the new RAID volume. First I used a Ghost boot disk to image the partition to a different drive. Then I used Ghost to take that image file and set up a new partition on the SSD volume. That second step of deploying the image took only about 10 and a half minutes to copy almost 31GB from the compressed image file. Not bad at all. Then with a quick trip back to the BIOS, I reordered the RAID to be the first boot drive. Then back in windows I just shuffled a couple drive letters around (moved the original c partition to the last letter – later I will clear this and merge it with another partition on the same disk). To wrap the setup, there were a handful of windows tweaks to streamline the use of the SSDs. All in all, super simple.

The difference was noticeable from these first couple reboots. While not the nearly-instant boot some youTube videos show, it was a marked improvement. Before and after the upgrade I timed the duration from power-on to the login screen and then from hitting enter on the login screen to a fully loaded desktop (and I have a LOT of services and tray apps that start). The pre-login time was improved, but so much of that is spent in POST steps the RAID only really kicks in when it gets to loading windows. On the other hand, the speed increase after logging in was awesome. The desktop comes up instantly and the tray apps (most of which are loaded on C), services, network connection (and login in to many services like steam, live, twitter, etc), are all ready in just a few seconds. The performance of other apps (on other drives) and games isn’t affected much, of course, but the OS overall feels snappier (even better than a brand new and optimized windows install). I’m looking forward to my upcoming Win7 upgrade to compare even further.

I ran several other benchmarks before and after. Some benchmarks are designed for spindle disks and others specifically for SSDs, and just a couple are decent at both, so I used:

  • ATTO and Everest Disk Benchmarks for both
  • HDtune, specifically for the Seagate HDD
  • AS SSD Benchmark, specifically for the RAID

I also included a test of my 300GB VelociRaptor now and then just to add some sense of scale. All of the data shown below is average and sustained to be conservative (for short bursts the metrics may far exceed this – for example, Everest reported reads as fast 482 MB/s).


Filed under Comp hardware / mods

Raiding for fun and profit (part 1)

Every year I’m compelled to make at least one or two upgrades to my computer(s) — whether I need them or not. Related to my main rig (“big red”), the upgrades always occur before the summer MillionManLan so I can take full advantage of them during the 4 day game fest.

This year’s plan is to upgrade to Windows 7 (from Vista). But I couldn’t stop there. Solid State hard drives have been dropping in price and improving in performance and reliability over the past couple years. All the manufacturers are a couple generations into it, and new additions like wear leveling, TRIM and aggressive garbage collection have made SSDs a viable option for everyday use. Once I saw the 30GB OCZ Vertex drop to $80 on newegg I knew this was an upgrade that had to be done before upgrading to Win7.

It was only after I received the Vertex in the mail that I realized my C partition was occupying 35GB. I was able to trim it back a little, but with hardly any apps on that drive, the bloated 64bit OS was mostly to blame. It became clear that shrinking my boot partition to a size that would still leave a comfortable amount of worry-free room on a 30GB SSD just wasn’t going to happen. I decided with two SSDs in RAID 0 I would have plenty of space (~60GB), PLUS I’d seriously increase performance even further. After plenty of research on the pros and cons, it was decided and I bought another. Sure, I could have send the 30GB drive back and opted for a bigger disk, but the two smaller drives were actually no more expensive.

These guys are small! Here’s a comparison of both next to an old iPod.

The first step was physically installing the drives, which is easy because they are tiny. I was able to plug them into any remaining SATA ports on my motherboard (since the BIOS would allow for reordering later on). Since I was on Vista, all the necessary software to define the RAID volume on the ICH10R controller was already loaded. I just had to switch the IDE mode in the BIOS to “RAID” and then define the new RAID 0 volume from the two disks in the Intel Matrix Storage tool. So far so good…until I tried booting to Windows. BSOD. Every time. Setting the IDE mode in the BIOS mode back to AHCI fixed the problem, so there was clearly some RAID-related driver issue. But Vista is supposed to have that loaded by default, right? Heck, I could even see it in the system32 directory. I tried reinstalling the latest RAID driver for the ICH10R, switched back to RAID – same thing. I spent a full night reading different threads about people with similar problems. Turns out, even though Vista (and Win7) install the RAID driver, it’s actually disabled if you don’t use it from the start, and takes a Registry modification to enable. You’d think that changing the BIOS IDE mode would flip the driver in use, but it doesn’t. After a quick regedit, I was in business. Windows was booting in RAID mode (although at this point my ssd volume was still empty). In the next update I move the boot partition over and generate some fancy graphs.

Filed under Comp hardware / mods

Girlie Bits and Bytes

As Christmas was rolling up at full speed, I set out to prep a decrepit PC for a second wind. Over the summer I came into the possession of a Gateway Astro (circa 2000) to be handed down to a lucky seven year old girl. This is one of those PCs that really should have been trashed a few years ago, but there is a certain kitsch factor to it – like the PC equivalent of a Mac SE.

Given the intended use there was no need to gut everything and do a full-fledged update, after all that 13.9″ CRT wasn’t going anywhere. I investigated what I was dealing with (besides many scary dust ferrets hidden inside):

  • 433MHz Celeron CPU
  • 128MB PC100 RAM
  • 60GB HDD (obviously updated somewhat recently)
  • CD ROM and Floppy drives
  • Windows 2000

Huh, pretty pathetic, but it’d be fine for running a web browser. First order of business was a complete tear down and clean up. Then on to a few updates inside. I replaced the CD drive with a CD/DVD player (no need for a burner here). Then I bumped the RAM to 256 – unfortunately the max the system could take. I removed the floppy altogether – just part of my civic duty to eradicate them. Lastly I moved on to dumping Win2000 and loading XP.

The next phase was more fun, and frankly what would matter most to a first grader. It was time to make this odd duck fit for a princess. I decided on a two tone pink color scheme and began giving all the case pieces a light sanding. After several coats of paint and lacquer it was looking downright…cute. I proceeded to amp it up with a hot pink cold cathode which would illuminate the now vacant floppy slot.

I ordered a new keyboard and mouse to go along with it – the old ones were SO old. And beige. Unfortunately, when the new mouse/keyboard combo arrived it was more purple-ish than bright pink as expected. Not one to compromise, I disassembled the mouse and keyboard and painted them to match! You can see a bit of the color difference in one of the pictures of the keyboard.

I was happy with how everything turned out, but our niece was even happier judging from her Christmas day squeal of excitement.

Filed under Comp hardware / mods

Fixing the Blu-Ray Blues

Not too long ago I moved my former PC of greatness down to its destined home, the basement AV rack. That was after a reconfiguration to Windows 7 RC and the addition of a spiffy new Blu-Ray (BD) drive and IR receiver. For the most part Win 7 is great, and the Media Center application is better than ever.

So I finally got to the point of actually trying out BluRay playback for the first time, and here’s what I got:

Well, crap! I spent a total of seven hours tracking down the source of the problem. My first expectation was the video driver, so I tried several clean installs of various versions. No luck. I thought maybe it had to do with some of the auxiliary applications I run (anyDVD and powerStrip), so I tried updating, then altogether disabling them. No luck. Maybe the actually software playing back the BD disc? I updated PowerDVD to the latest version. No luck.

With all the software options running out I started to suspect hardware. To eliminate the BD drive itself, I tried playing back a 1080p rip of Ironman. Sure enough it quickly threw up the same BSOD. So, it seemed there was a problem with 1080p video decoding in general. Wasn’t my trusty 7900 GT OC up to the challenge of BluRay decoding? After all, 720p videos were playing fine and it still had decent power for gaming last time I used it.

Google eventually led me to this thread where one guy recommended changing the K-Lite ffdshow configuration for H.264 decoding. Pretty obscure, but I did that and then tried to play the Ironman file and it worked great! So this was definitely pointing to something about the 1080p H.264 decoding as the problem. I tried to play a BluRay disc in the drive again and got another BSOD. See, changing the ffdshow decoder works fine for apps that use ffdshow (like Media Player Classic and VLC Player), but it’s not used by powerDVD which is one of the very few programs that reads BluRay discs well (i.e. support the latest BD features). Not only that, but ffdshow involves software decoding leading to much higher CPU utilization than with hardware acceleration.

From there I started reading about the basics of Windows hardware acceleration trying to understand why I was crashing during HiDef playback. DXVA (Direct X video acceleration) is Microsoft’s API for hardware acceleration and, in my case using an Nvidia card, PureVideo is the bit-stream link for DXVA to use the GPU for processing. DXVA was even enhanced on Vista and Win 7, so what gives? Turns out, my 7900GT features Nvidia PureVideo technology, but not their enhanced version, PureVideo HD (this was added in the 8 series GPUs). The original generation of PureVideo cards apparently handles MPEG-2 decoding very well, but the second generation handles H.264 1080p decoding much better.

So, I needed to upgrade the graphics card after all. I decided on a 9500GT which offers the hardware acceleration I needed at a pretty low price point. While I was at it, I went with a card that had a native HDMI jack and a large heatsink with no fan. It also has 512MB of RAM, up from the 256MB on my last card. Suddenly 1080p playback with hardware acceleration was a breeze and CPU usage dropped way, way down. The native HDMI connection is extremely nice, too – the picture is sized and centered perfectly (no more need for PowerStrip) and much sharper than VGA which I was using before.

Filed under Basement, Comp hardware / mods

Mouse Refab

I’ve had a Logitech G7 wireless mouse for about 3 and a half years. While every other piece of my gaming rig has been replaced and upgraded, I still am lovin this mouse. The sensitivity is great, the weight is nice, and the body is just right. You can even still get new rechargeable batteries for only 5 bucks and a new, slick set of feet for $2. But after all these hours of gaming (and some work) it’s showing signs of wear. Mechanically, it’s held up great, but the finish in a few spots has worn off leaving a somewhat rough surface at the palm and fingertip areas. So I decided before the past MML I’d refinish it.

I started with taking it apart and cleaned it up. There were 3 pieces that needed painting (since I didn’t care to repaint the bottom. To remove any dirt and oil from the three pieces I give them a wash in dish soap, then a thorough rinse. Then I used a small piece of 400 grit sandpaper to remove the former glossy coating and smooth the areas that were roughly worn. Then I donned a pair of latex gloves and gave them another rinse, dry, and then used a swab of mineral spirits to remove any last residue.

I decided to use Dupli-Color’s gloss black Vinyl & Fabric Coating. This stuff (also known as vinyl dye) is unlike usual spray paints. Instead of making a coating over a surface, it sinks into the object, and because of that it’s more flexible and durable. From what I’ve read, vinyl dye is the nicer way to plaint most plastics and especially any that will be handled a lot. I thought about using multiple colors and stencils, but opted to keep it simple and go with gloss black and clear coat. The clear coat to use is Acrylic Lacquer, not the Enamel Lacquer they also make.

Thin coats are key since it can easily run and there’s no need to pile up a think coating (since it’s going to sink in anyway). I started with about 3 black coats, then wet sanded with 800 grit, and repeated the process. After that, I sanded and coated the center piece one more time. You only need to wait about 15 minutes between color coats so the whole process doesn’t need to take too long. Once the black had time to dry very well, I started with the clear coat. After about 3 thin coats I wet sanded with 1000 grit and finished with two more coats.

After re-assembly (with new feet!) I let the whole thing sit for a week before using it. I even put it out in the sun a couple afternoons to really cure it. The final result is like a new mouse. By varying the number of coat-and-sand cycles I got a nice subtle distinction between the center and the sides. Maybe next time I’ll go for something more graphic.

Filed under Comp hardware / mods

Computer Build 09: Part 13 (it’s a wrap!)

This past weekend I put the finishing touches on the big red box. Here’s a rundown of all the last projects in pics.

Added handles. These are standard drawer handles from Lowes.

Added soft grips to feet. The original feet were clear acrylic – nice looking, but hard and smooth. These pads add some grip and may quiet things a bit.

Created green board cover. Remember how the wireless network card had a green circuit board? I made this cover from a piece of acrylic, some black mesh, and an old ISA slot cover.

Using the same mesh I covered the top of the front panel bay device just to clean up the appearance.

Added third hard drive. Brought one more drive over from my old machine. This one sits behind the front 120mm fan.


Filed under Comp hardware / mods

Computer Build 09: Part 12

So what’s to be made of all those numbers in the previous post? What kind of difference has all that tuning made to performance? Let’s take a look.

3Dmark06

This is the previous gen benchmark from Futuremark and is still useful for comparing against older DX9 systems. Here I could compare my stock and overclocked scores from the new I7 machine to my previous best score from my old 939 system (AMD X2 4400+ OC’d to 2.6, 7900GT OC).

3Dmark Vantage

Vantage is the latest benchmark from Futuremark and it puts a good test on the graphics system (including DX10 features) and the CPU (including physics processing). Incidentally, during the overclocked run the CPU temp peaked at 76°C and the GPU hit 65°C.

Crysis

Since it was released in Nov ’07 the game has been making graphics cards cry uncle. Using the CryEngine 2 engine it takes advantage of the latest DX10 features and makes extensive use of physics processing. The game includes a built-in benchmarking utility which makes for reproducible test runs. The temperatures reached in the overclocked configuration were 65°C on the GPU in the graphics test and 54°C on the CPU in the CPU test. Both tests were run with 64bit high quality settings, 1920×1080, and 2x anti-aliasing.

Team Fortress 2

TF2 is a fairly low demanding game graphics-wise, but one I play a lot. This benchmark (as well as for the other games) was averaged from multiple runs of typical gameplay at max quality settings.

Left 4 Dead

L4D is one of Steam’s newest game set in the middle of a zombie apocalypse. The number of on screen models and sophisticated physics and AI engine make the game fairly demanding on the highest quality settings (1920×1080, 4x anti-aliasing, 4x filtering, high quality)

UT3

Unreal has been a staple of fast-paced FPS for years. UT3 is a couple years old now, but still provides a decent graphics test with high settings (1920×1080, max quality).

Audio Encoding

For this test I ripped an audio CD to mp3 (13 tracks, 256kbps, CBR, Lame encoder).

Video Encoding

For this test I converted a 40MB flv video to mp4 H.264.

WinZip

Here I compressed 223MB (17 files) into a new zip archive.

In summary, while the synthetic benchmarks show sizable gains from overclocking, most games already run so smooth on this platform that there is only a relatively small difference in frames per second. The improvement tends to be about 10% which is in line with the overclocking on the graphics card. The big boost I made to the CPU simply doesn’t factor into in-game performance since there is already ample processing power. In comparison, the encoding and compression tasks that rely on the CPU showed a nice 20-30% performance bump.

Filed under Comp hardware / mods

Computer Build 09: Part 11

With the hardware side of my build nearing the end, I’ve been working on system tweaking and overclocking. The new I7 platform has a lot of new overclocking facets to it over the AMD architecture that I was used to. I7 overclocking revolves around the base clock frequency (Bclock) a pretty close analog to the Front-Side Bus speed of the old days. Changing the Bclock affects the speed of the CPU, the L3 cache, the on-chip memory controller, and the RAM and each one of those is further tailored by a multiplier. Another new player is the Quick Path Interconnect (QPI) which is like the HyperTransport that AMD has had for years – in lieu of a Front-Side Bus, the QPI connects the CPU to the motherboard chipset. Generally the QPI has plenty of bandwidth so you can keep it scaled back a bit as you crank up the CPU and memory. And of course with overclocking comes voltage tweaks to feed the power that’s necessary.

The bios on my new machine gives access to tweak all these thing and is laid out very well. It also supports storing overclock settings to different profiles to make it easy to switch around and compare. Here’s the screen that deals will the clocks and multipliers (with the default settings). Besides this there is another screen for changing voltages and another for RAM timings.

In my first tweak session, I initially pushed things too fast without the necessary bump in voltage and it wouldn’t post. After edging some voltages up (Vcore and VTT) and the speed (Bclock) back down I starting having more success. After several more trials over a couple weeks I got things dialed in pretty well, while not raising the voltages (and the temps) too far. Currently I’ve raised the CPU up around 43% to 3.8GHz. That’s over a full gHz over the stock speed (for free!) so I’m pretty pleased. I have speed stepping still on so it doesn’t run at that speed full-time, though. I also have Intel’s Turbo feature enabled which means at times one core may jump up to about 4Ghz!

Param Default OC increase
CPU (GHz) 2.66 3.8 43%
Bclock (Mhz) 133 190 43%
Vcore 1.17 1.31 +140mV
VTT 1.15 1.29 +140mV
VIOH 1.10 1.22 +120mV
QPI (MHz) 2400 3425 43%
DDR3 1066 1524 (7 7 7 16 1T) 43%
CPU Temp (typ C) 32 44 +12
Mobo NB (IOH) Temp (typ C) 39 42 +3
Mobo SB (ICH) Temp (typ C) 28 30 +2

I also cranked the graphics card up just a bit. My GTX260 is already EVGA’s factory overclocked model, so I didn’t want to push it too much further, but with decent cooling in my case I knew I could get by with a little.

Param Default OC increase
Core 626 675 8% (17% over standard gtx260)
Shader 1349 1455 8%
Memory 2106 2400 14%
GPU Temp (idle/max C) 37/65 40/70 +3/+5

Filed under Comp hardware / mods

Computer Build 09: Part 10

While the overclocking and tuning continues, I did manage to finish the case lights over the weekend. I choose to use white lights so the colors of everything (which have been all nicely coordinated, after all) wouldn’t be washed in any particular color. I got a couple 12″ Logisys LED sticks. They are just like the more common cold cathode tubes, except inside the tube is a very slim circuit board with LEDs mounted to it. It tends to be a little cooler than the CCFL route and more importantly takes 12 volts directory without the need of an inverter module.

The only trouble with these lights is that with 18 white LEDs each(!) they are crazy bright, especially in a darkened room. So I decided I’d create a little screen over each one to tone them down. I found this decorative mesh at Home Depot which had the open to closed ratio I was looking for. I cut off a couple chunks with tin snips and folded it into a U-shape, then painted it red to match the case.

Then I slipped each LED tube into its screen and mounted them to either side of the top of the case with zip ties. I also soldered everything up to the switch and mounted it to the front panel. I’m pleased with the final effect. The light is white so you can see the red and black theme inside nicely, but you don’t feel the need for sunglasses.

Filed under Comp hardware / mods