So about a month ago I decided that before any Halloween prep began (which I’m now in the thick of) it would be a good time to build the projection screen. Remember, up to this point I’ve been just using the wall and I tested a couple shades of paint. And just to be extra helpful I thought I’d document my build in tutorial fashion.
Step 0. Determine the size
While not really part of the building process, I thought I’d start here since it can take a fair amount of thought and can greatly influence the building materials you use. If you’re looking at making a screen, you’re already under a certain set of constraints like the size of picture your projector can throw. This of course is a factor of where your projector is located, its zoom range, your room layout and so on. You should also consider your seating distance, and how that impacts viewing angle and pixel visibility. Then you need to consider the aspect ratio of the screen (4:3, 16:9, 2.35:1). There’s a bunch of great web pages on choosing a screen size, so I won’t go into all that.
What I will point out is that you want to consider your building materials as you pick a screen size. Lumber and paneling is easiest to get in 8′ lengths and king size sheets are only good for about 100″ wide. Given the building material factors I sized down from an initial 100″ wide to 96″ wide. That’s still 110″ diag for a 16:9 screen so it’s plenty large. Not only that, but the trim around the frame will add about 5″ to the width, leaving me with just a couple of inches of width left on each side in my space.
Step 1. Designing the frame
There are lots of ways to go about building the frame, but generally they all involve two-by lumber. The most important aspects of a good frame is that it is square and flat. It also must be sturdy enough to support and tension whatever screen material you use (in my case, a bed sheet).
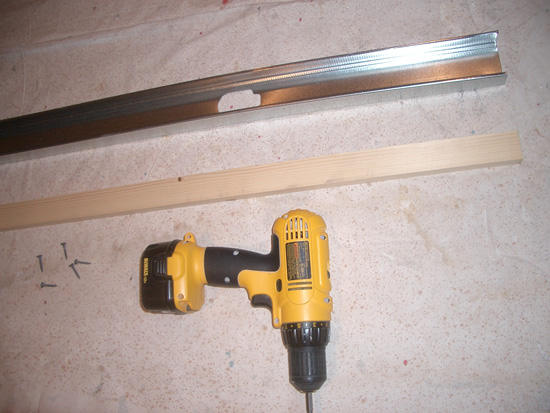
I decided to make the frame from light gauge steel studs (like I used in framing the basement). They cost a couple bucks more than lumber, but they are perfectly straight, easily modified by tin snips (and without making a mess), and very lightweight. Weight isn’t a big factor one way or the other, but being able to easily move it around by myself and not having to go overboard when hanging it were pluses.
I bought 5 eight foot studs of the smaller width (near 2.5″) – four would create the frame’s border and one to span the center. I used the full 8′ lengths, to give me the 96″ viewable screen width, and trimmed two of the studs to 54″ for the screen height.
Step 2. Wood Meets Metal
The first step in building the frame was thinking ahead to how the sheet would later get stretched and secured. Fastening the sheet to the steel stub could be done, but it’d take more effort than using a staple gun. To make things easier I attached a 1’x2″ furring strip to one side of the studs using 1″ drywall screws. It’s better to add these wood strips sooner than later so they can be secured as the frame is built (otherwise the metal flange they are attached to may flex and the sheet won’t remain tight). You also have to take into account the additional 3/4″ (x2) this is adding to your stud width. I used this additional measure as an overlap area for the trim bordering the frame later. If you were going with a unframed/untrimmed screen you’d want to shorten the studs to keep your overall planned height and width.
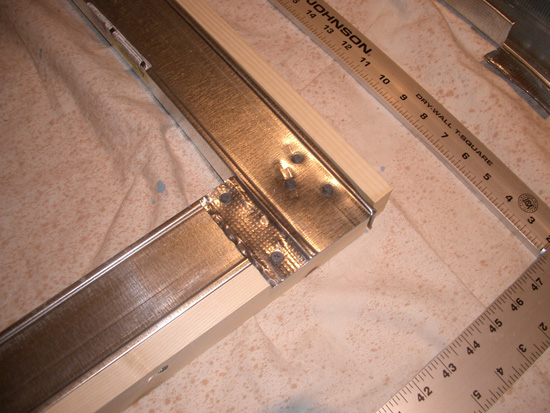
Step 3. Get it Cornered
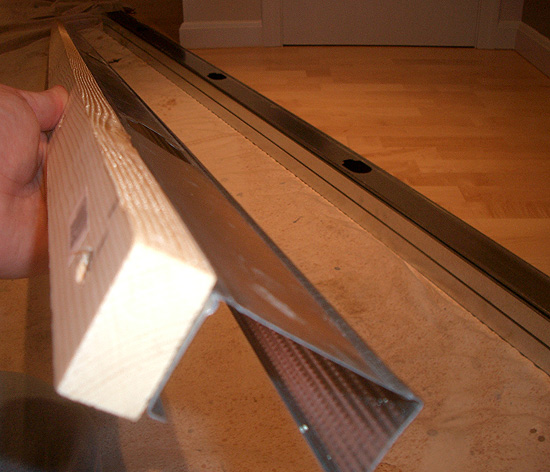
I snipped the ends of the 8′ foot studs to accommodate the other stud coming into the corner.
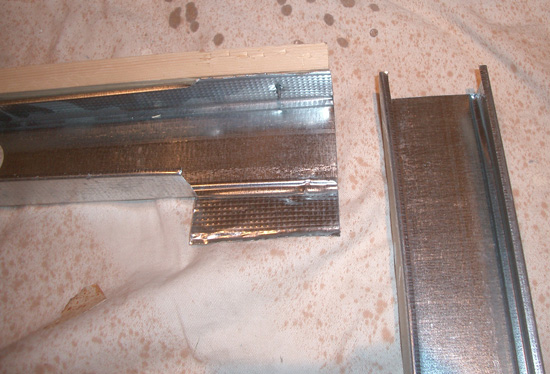
The resulting metal flap was used to help join the corner and stiffen the furring strip. A drywall square was helpful in keeping the corner properly square.
This continued for the other three corners until the main frame was together.
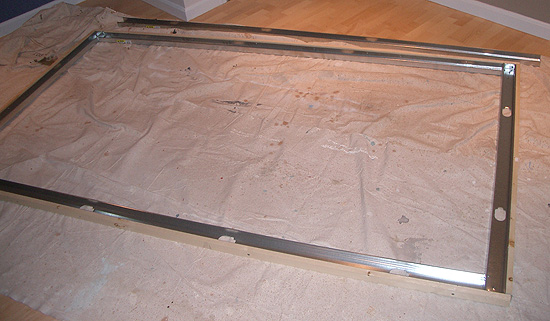
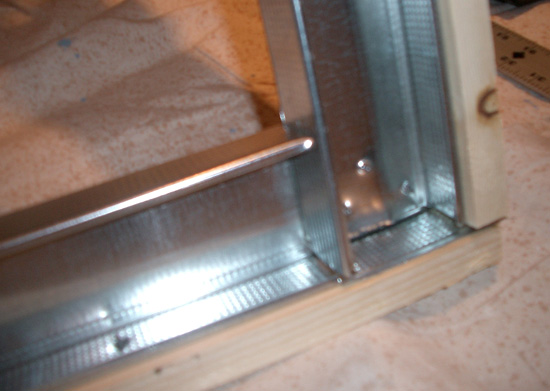
Step 4. Add the Brace
It’d be easy to go crazy adding more studs to stiffen things up, but I decided on a single stud to span the center. Besides adding some rigidity, this also gives us a place to secure the backing board in the middle of the screen. Like the corners, the side studs were trimmed to accommodate the center stud and everything was screwed together.
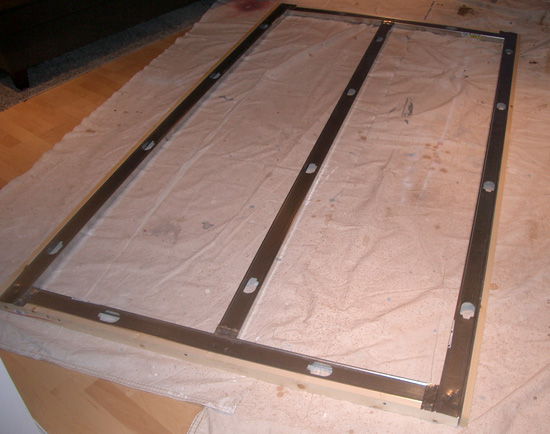
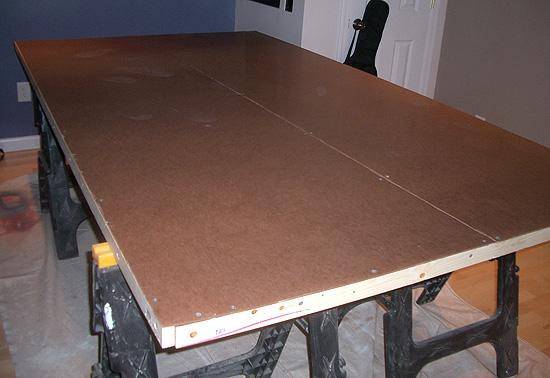
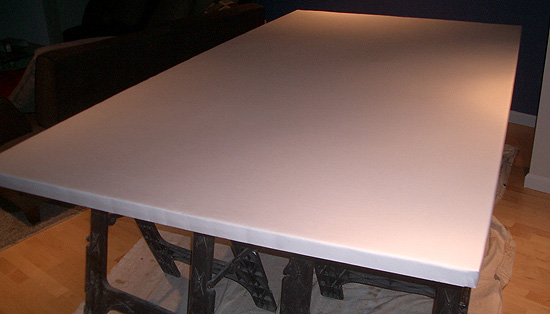
Step 5. The Backer Board
The next step is to put a solid surface across entire frame to help support the screen. I suppose you could skip this element, but it seems well worth adding given the rigidity it adds to the frame and the durability it adds to the screen. The backer doesn’t need to be very thick – I used 1/8″ hardboard. Since the screen height will be 54″ a single 4’x8′ sheet won’t quite do the job. Instead of using a full sheet and a flimsy 6″ strip from another, I ripped the two sheets into lengths 27″ wide. Keeping the backer boards as flat as possible on the frame I used short drywall screws to secure them to the frame and center stud.
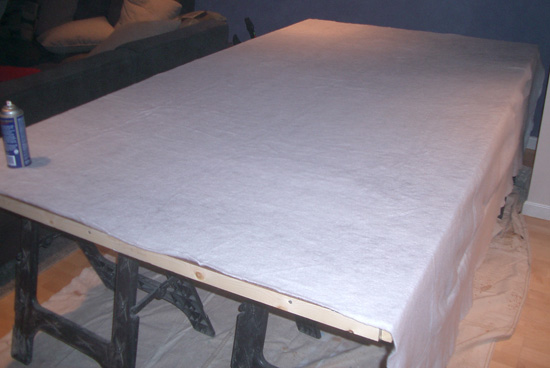
Step 6. A Soft Underbelly
One more step before adding the sheet and that’s to add a layer of padding on top of the backer board. This layer help disguise any imperfections in the structure underneath (screw heads, slight gaps between the pieces of backer, etc). I think it also help make a smoother result when you get to stretching the sheet. One large package of quilt batting was perfect to cover the area. I used spray adhesive to attach the batting down to the backer board. The excess batting was then trimmed just a little past the edge of the frame.
Step 7. Finally, the Sheet
That brings us to the most important step, the projection surface itself. Even though you’ll be putting several coats of paint, you want the smoothest surface you can get. A high thread count is important, so it pays to shop around for a bargain on a top-notch sheet. Even more importantly, make sure the sheet doesn’t have any decorative stitching or textured patterns to it. I picked up a neutral colored, 850 thread count, king size for about $40 from a clearance rack. I gave the sheet a wash, spread it across the batting, and ironed it thoroughly. Heck, I ironed it a few times. I left the size long to be trimmed later (you’ll appreciate having the extra material to grab when stretching it).
To fasten the sheet I started by stapling the center of each side. The sheet was pulled down over the edge and stapled into the wood strips on the back side. After the four centers are secured, focus on one corner at a time. Work your way down two sides, from the side’s center, toward the corner. You really want to pull it tight as you go. My sheet ‘expanded’ and loosened during the painting step and I actually had to go around and unstaple, repull, and restaple – not fun! Pull the heck out of it first time!
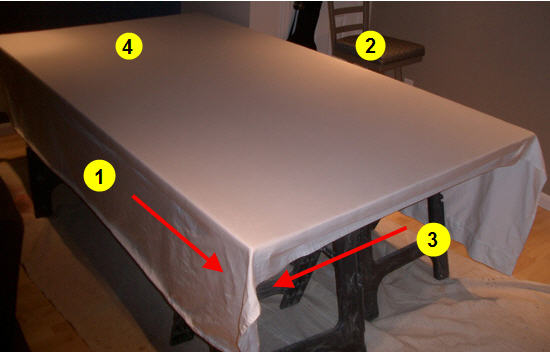
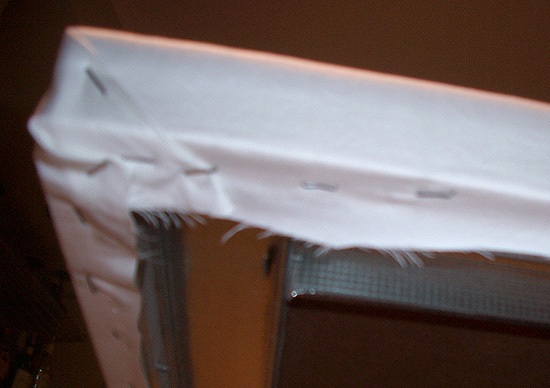
To finish the corners, I just folded the sheet over to one side, similar to wrapping a present, and secured with a staple.
Step 8. Painting the Screen
If you end up doing a DIY screen I highly recommend doing a paint test so you can decide the best fit for your p
rojector, your room, and the amount of light you tend to have while watching something. From my earlier paint test I decided on using Behr Silver Screen flat indoor latex (the darker shade I tested). This shade is a good comprise between decent brightness, and reduced ambient reflection for good contrast. I used a high quality, 1/4″ nap roller to spread the paint. Avoid glopping it on too heavy, so you don’t saturate the batting underneath. It won’t cover well at first, but you’ll be applying many coats. I think I did about five coats and it only used about 1/3 of a gallon. After the first couple coats – by the time there’s decent coverage – I noticed the sheet had a fairly rough texture despite the high thread count. I used some P220 sandpaper to smooth things out between the remaining coats and the difference was remarkable. The finished, painted sheet feels more like vinyl than linen.
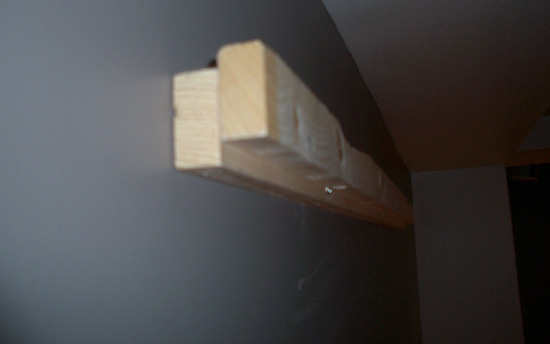
Step 9. Hang it up
I thought quite a bit about how to mount the screen. I wanted something that was very sturdy where the screen couldn’t be tilted if you brushed up against it. Remembering that the open sides of the studs face the wall, I decided to use a sort of ledger board out of leftover 1×2’s. The ledger actually fits inside the upper piece of the frame and the natural lip on the flange of the stud ensures the screen stays put. The ledger was long enough to be screwed into three wall studs.
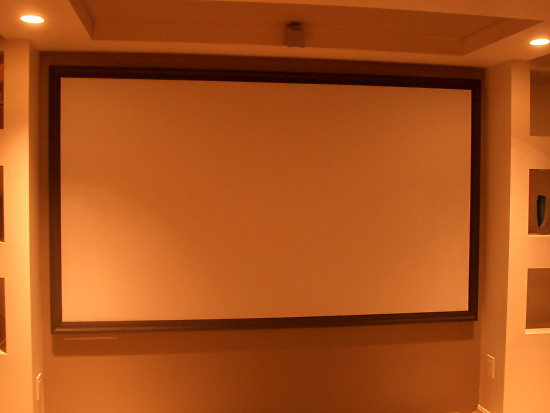
Step 10. Adding the Trim
The final step was to attach a nice frame of some sort around the screen. Ideally, you want this frame to be black, completely non-reflective, and at least a couple inches wide. With the dark border the relative brightness of the screen’s picture really seems to pop. I chose to make the frame out of a style of door molding that very closely matches the frames of some art we have in the room. The pieces were miter cut, sprayed with flat black paint (a few coats), and assembled with L-brackets and 1/2″ screws on the back side. The frame was sized so the inside opening was right at 96″ by 54″ (remember that gives me 3/4″ overlap all around between the trim and the screen). The frame was attached with L-brackets on the side of the screen and front-facing velcro strips. The advantage of the velcro mounting is that the trim can be added while the screen is hanging (no need to screw it in from the back). There’s also an added benefit in case the screen ever needs to be taken down, that the frame is easy to first remove so you don’t need to lift the screen by the more flimsy trim.
Last Impressions
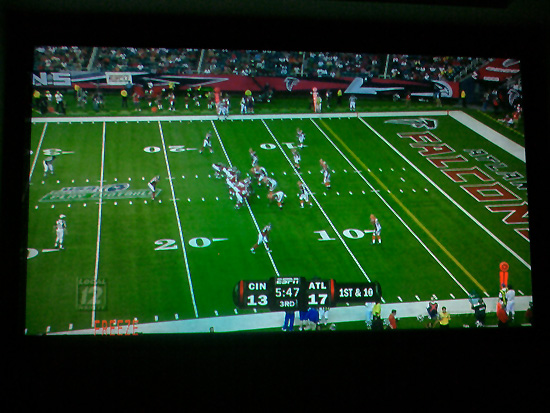
All together the cost was about $120 – half of that coming out of the sheet and the gallon of paint. The whole project took about a week, but mostly because I was just doing a coat of paint a night. I’m really happy with the final result. As you can see, the brightness is uniform (no hotspots) and the blacks are very dark. Watching those Bengals lose never looked so good!